

Chatroom From Scratch: React + Firebase
Since many people have been suggesting I explore Firebase recently, I have decided to take up the advice and build a demo app out over the weekend. I’ve decided to pair it with React as the frontend, since I have prior experience with it, and this little exercise could serve as a good refresher on React, while providing us with an opportunity to learn some basics of Firebase. Before getting started, let’s read a bit about what Firebase is.
What is Firebase?
Firebase, acquired by Google in 2014, is now generally treated as a Backend-as-a-Service (Baas) product, which takes care of most of the basic backend needs (server / database / etc.), enabling you to focus on the frontend user interface and experience. It integrates easily with all sorts of applications and programming languages, and provides real-time database (in the form of a NoSQL DB) which makes it very neat for our demo app - a chat room. It also provides easy integration with popular OAuth2 servers such as Google, Facebook, Github, and so on, but also supports basic email/password authentication.
What’s more? For our demo purposes, the free plan should be much more than sufficient! Check out the pricing chart for a more detailed explanation.
Detailed Steps
1. Create a Firebase Project
Before we start, we do need to create a Firebase account and project. Navigate to the Firebase console (login to your google account if not already logged in), and click on “Create a Project”. Enter a name for your project (or add it to an existing project). For me, I’ve named the project as “react-firebase-demo”. When the project is ready, click on “Continue” to move on to the dashboard.
2. Create a React App
Note: If you don’t have npm and/or Node.js on your machine, please follow the official guide to obtain them. After that, you will also need to use npm to install create-react-app which we will use to generate a template application. To install that, npm i -g create-react-app.
Note: I usually like to initiate a project on github itself, then git clone the files down into my local directory, but you can of course do it the other way around.
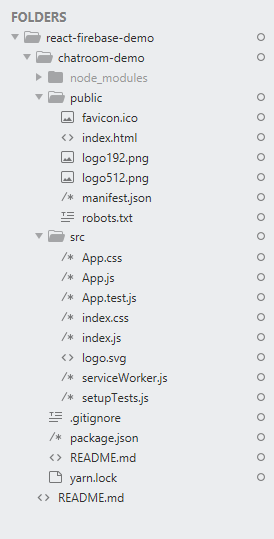
Once you have them installed, open a command line window at your desired location, then create a template React app using create-react-app chatroom-demo, where the chatroom-demo is simply any name you want to call your new project. For example, I first created a repository named react-firebase-demo on Github, then within that local repo, ran the create-react-app command, which results in the following structure:
|
|---|
Testing your React app
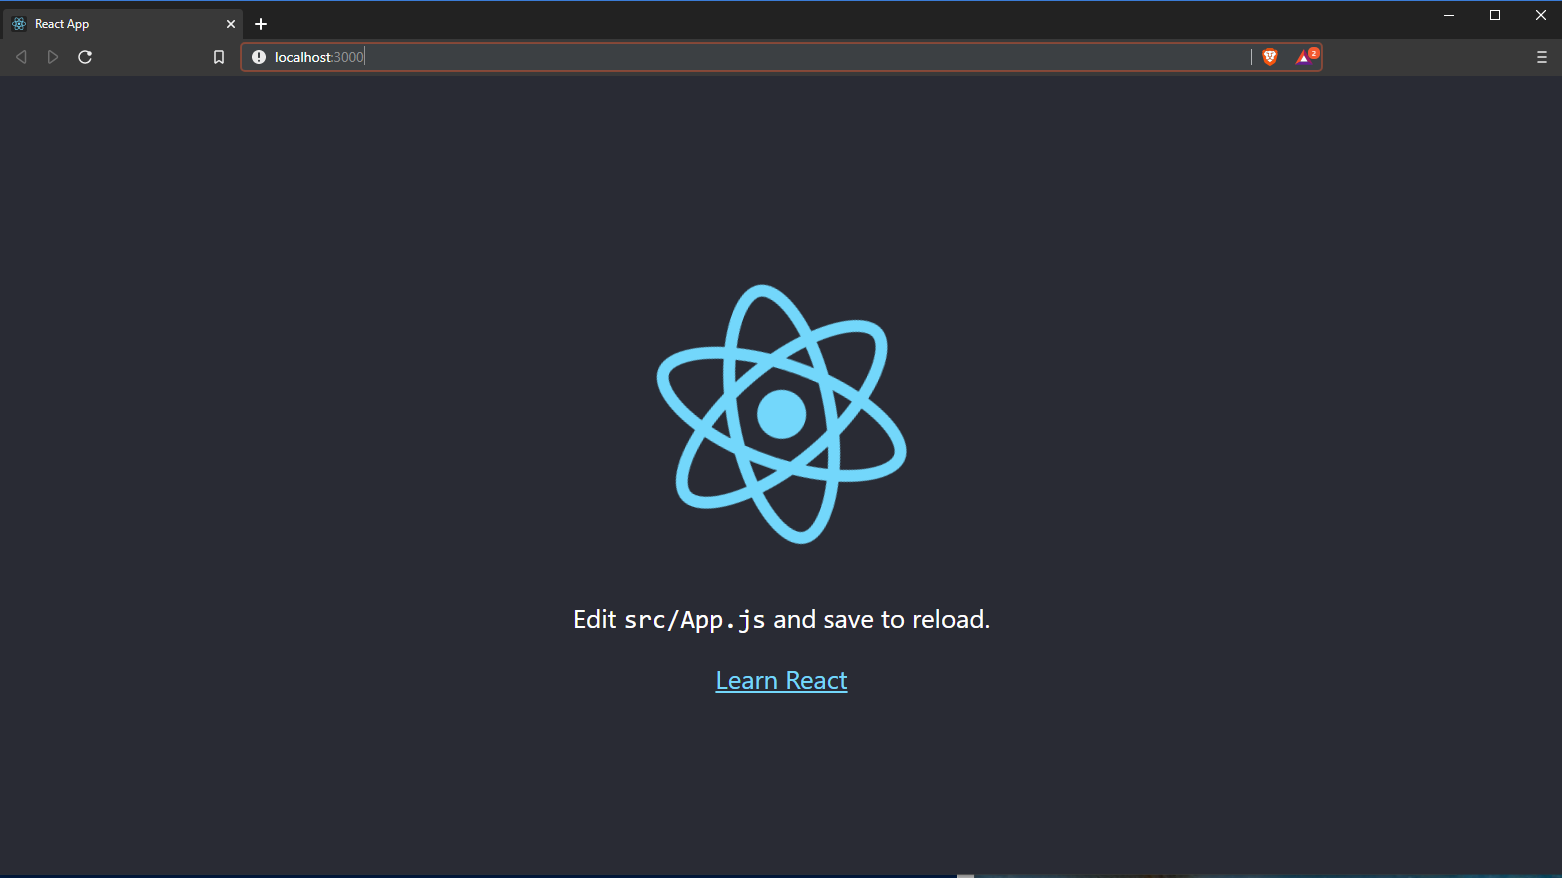
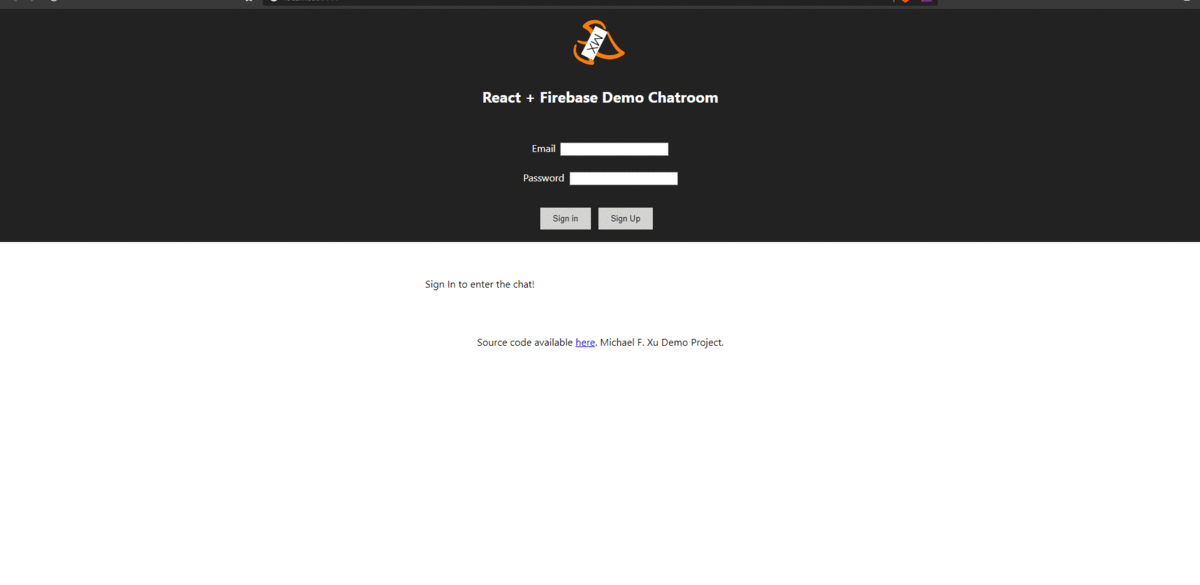
Navigate into your project folder (cd chatroom-demo), and start the app: npm start. A browser window should open for you, showing something like this:
|
|---|
3. Test Deployment on Firebase
In this step, we will simply deploy our default app onto Firebase to checkout the deployment process. Once we are familiar with this, we will go back to our React app, make changes (add in codes to make our app a real chat room), and perform a new deployment. Note that this step is simply using Firebase’s hosting service - it has nothing to do with its realtime database, yet.
- First, we need to install the CLI provided by Firebase:
npm install -g firebase-tools - Now, we generate a production build for our React app:
npm run build; -
Next, simply type in
firebase initand follow the on-screen instructions. (First step is probably to login)* Choose Database and Hosting: Which Firebase CLI features do you want to set up for this folder? Press Space to select features, then Enter to confi rm your choices. (*) Database: Deploy Firebase Realtime Database Rules ( ) Firestore: Deploy rules and create indexes for Firestore ( ) Functions: Configure and deploy Cloud Functions >(*) Hosting: Configure and deploy Firebase Hosting sites ( ) Storage: Deploy Cloud Storage security rules ( ) Emulators: Set up local emulators for Firebase features === Database Setup * Keep this as defaulted. Firebase Realtime Database Rules allow you to define how your data should be structured and when your data can be read from and written to. ? What file should be used for Database Rules? (database.rules.json) === Hosting Setup !!! IMPORTANT !!! Type in "build" for public directory; Answer "yes" for single-page app; Answer "no" for overwriting. !!! IMPORTANT !!! Your public directory is the folder (relative to your project directory) that will contain Hosting assets to be uploaded with firebase deploy. If you have a build process for your assets, use your build's output directory. ? What do you want to use as your public directory? build ? Configure as a single-page app (rewrite all urls to /index.html)? Yes ? File build/index.html already exists. Overwrite? No - Now we are ready to perform the deployment:
firebase deploy. When ready, it will generate a “Hosting URL”, which you can use to access your app, this time on the internet (not just locally). For me, it ishttps://react-firebase-demo-68bad.firebaseapp.com, and navigating to the url confirms I can see the same page I saw earlier when I ran the development server (npm start).
4. Firebase Configuration
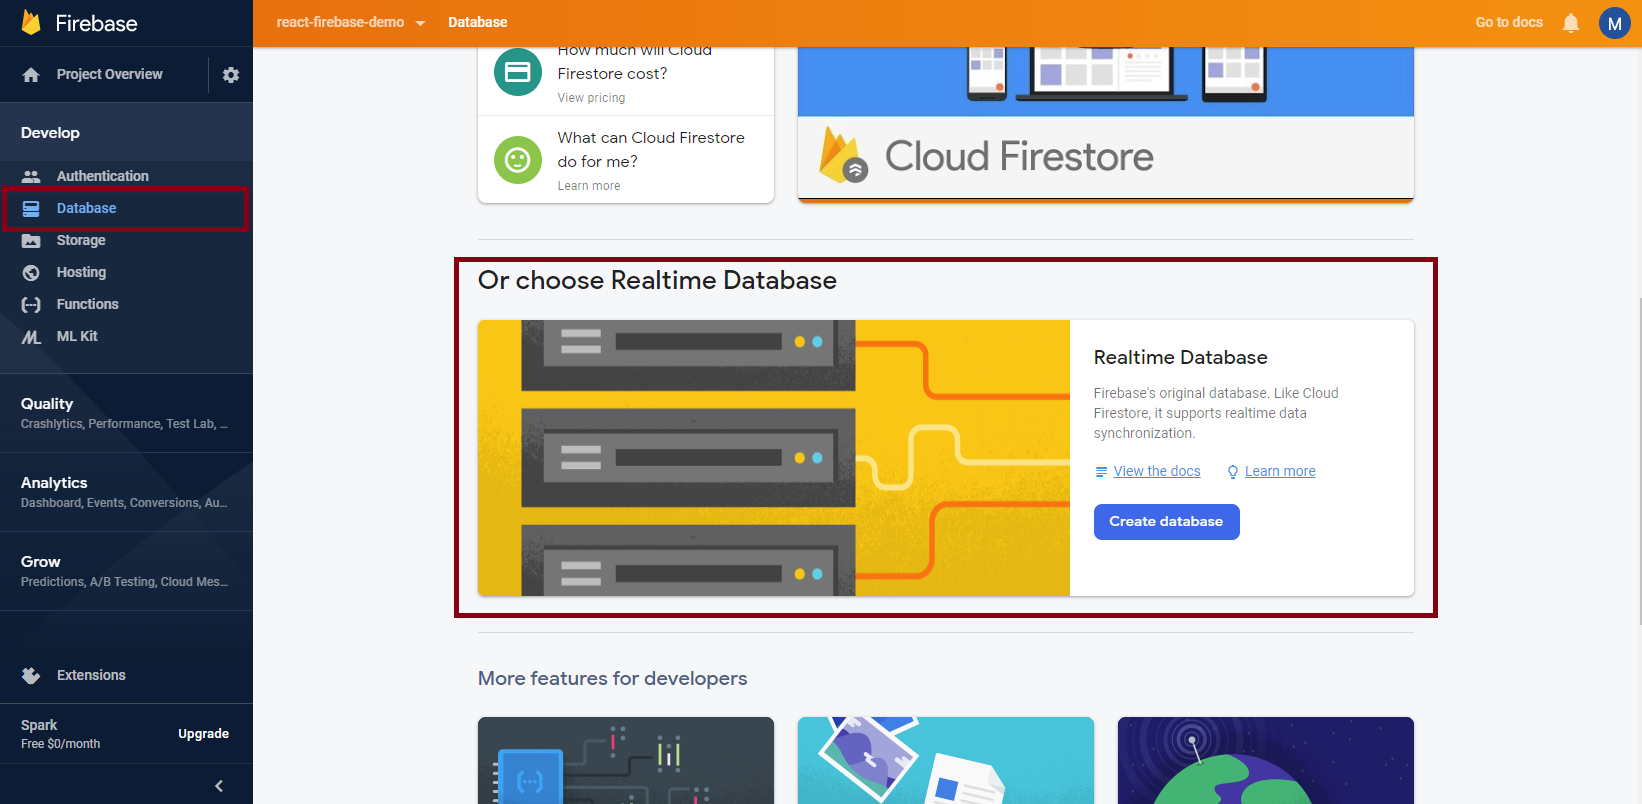
Since we will be using Firebase’s Authentication and Realtime database service, we will need to enable them on our console. On the web console, from the sidebar, click on “Database”, scroll down a bit and find “Realtime Database”, then click on “Create Database”.
|
|---|
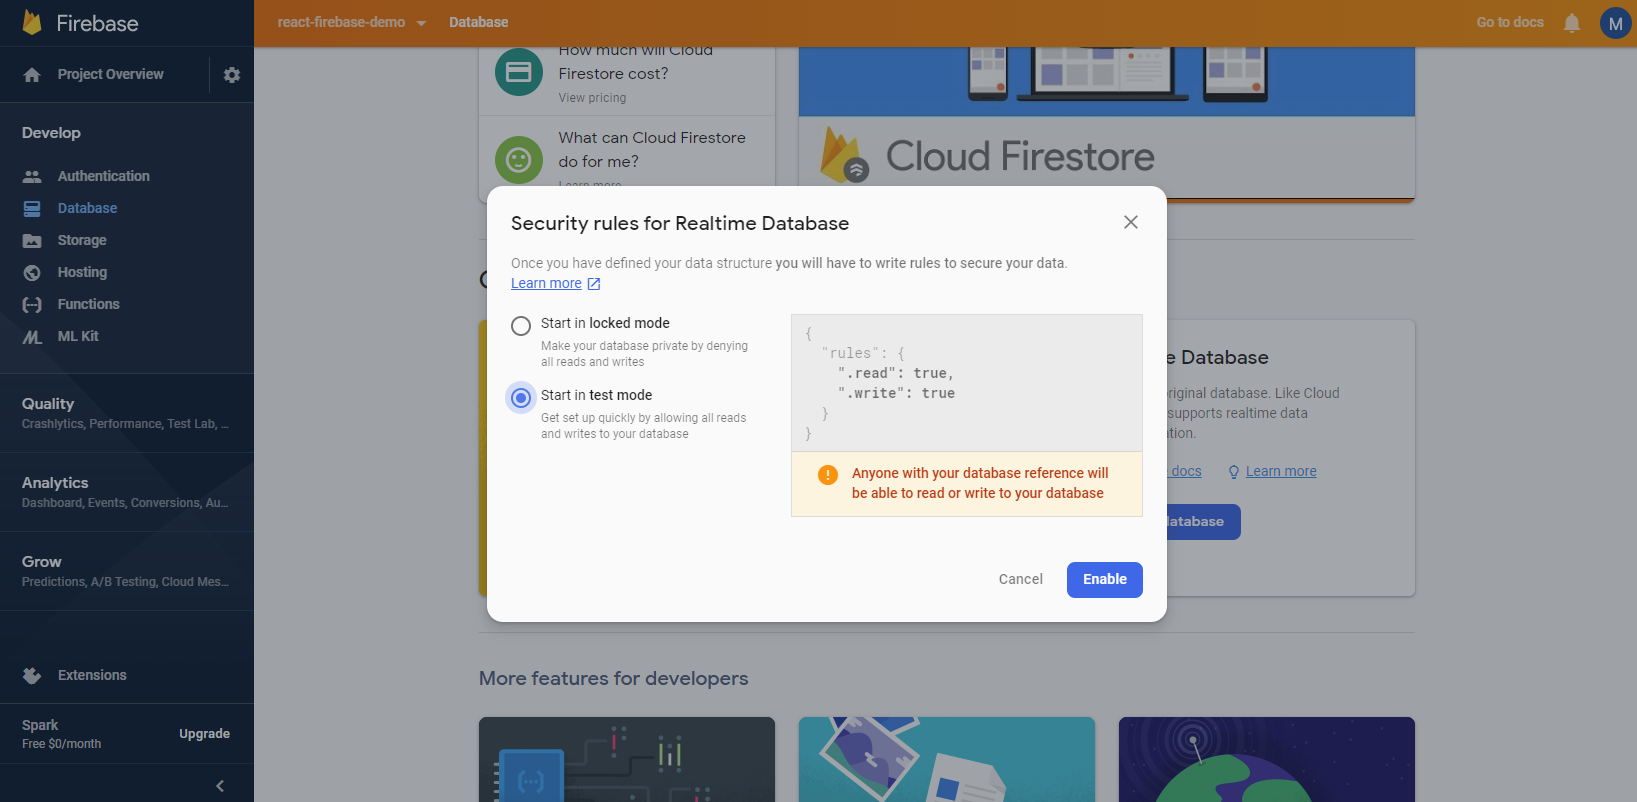
We can use “Test mode” for now:
|
|---|
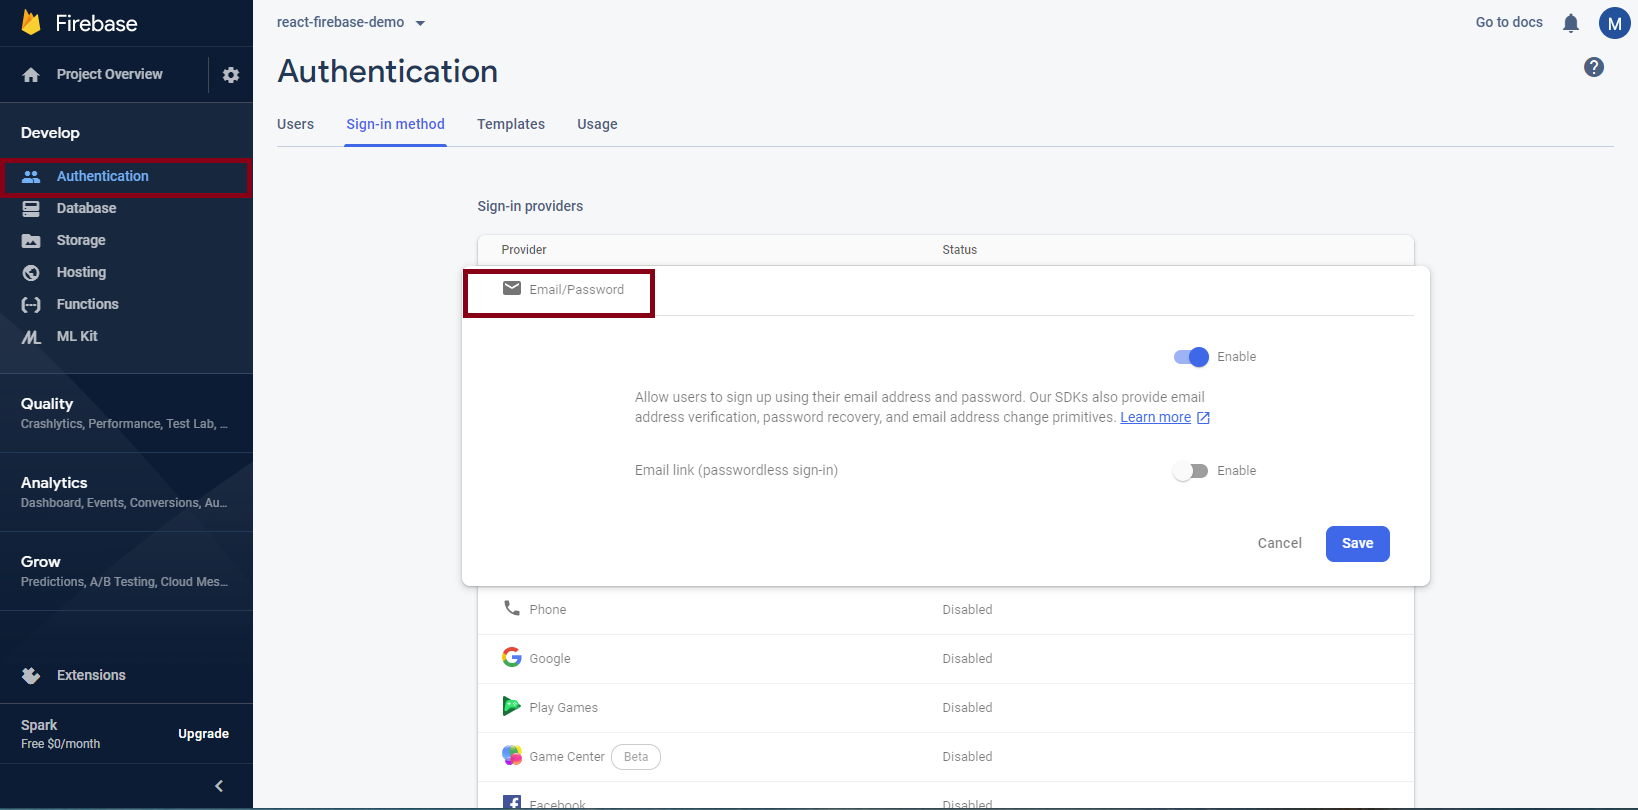
Next we can move on to “Authentication”, also from the sidebar. Under the “Sign-in Method” tab, enable “Email/Password”.
|
|---|
5. Create Chatroom in React
Now we are ready to develop the React app locally. When everything looks great locally, we will then redo the deployment, and enable the world to use our awesome chatroom! First let’s define our goal. We will want to build a chat app, as simple as possible, that does the following things:
- User login;
- Once logged in, a user enters a public (one and only) chat room, which displays the last 100 messages sent by any users;
- Users can send messages to the chat, which would then be displayed on all other connected users’ screens.
Sounds simple enough, yes? Let’s get started!
NOTE: I will provide snippets of the codes used and explain what is being done, but for a fuller picture, please checkout my github repo where the complete code example is hosted.
Install firebase
npm install --save firebase so that we can use it in our React app to connect with the services.
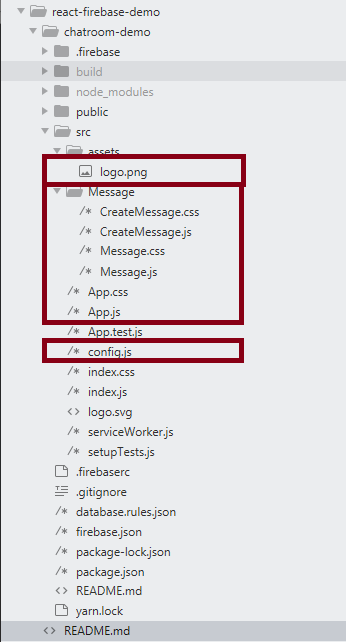
Folder Structure
The following structure works but if you are well-versed in React, feel free to make all sorts of improvements. We will be working with:
Message.jswhich renders a single message object (username & message content);CreateMessage.jswhich mostly handles sending messages to the database / chatroom;App.jswhich wraps these 2 components, and provides a login / signup functionality;config.jswhere we put ourfirebaseconfigurations.
|
|---|
1. Message.js
We will use this Message Component to display messages in the database; it will be rendered for each message retrieved from our database.
import React, {Component} from 'react';
import './Message.css';

export default class Message extends Component {
  render() {
    return (
      <div className="message">
                <span className="message__author">
                    {this.props.message.userName}:
                </span>
        {this.props.message.message}
      </div>
    )
  }
}
2. CreateMessage.js
export default class Form extends Component {
  constructor(props) {
    super(props);

    this.state = {
      userName: '',
      message: '',
      list: [],
    };

    this.messageRef = firebase.database().ref().child('messages');
    this.listenMessages();
  }

  handleSend() {
    if (this.state.message) {
      var newItem = {
        userName: this.props.user.email,
        message: this.state.message,
      }
      this.messageRef.push(newItem);
      this.setState({ message: '' });
    }
  }

  listenMessages() {
    this.messageRef
      .limitToLast(20)
      .on('value', message => {
        console.log(message.val())
        if (message.val()) {
          this.setState({
            list: Object.values(message.val()),
          });
        }
      });
  }

  ...
Here listenMessages and handleSend are the two functions we would focus on. The former keeps an open connection with firebase realtime database, which would always retrieve the latest 20 messages. handleSend pushes new messages to the firebase DB, each message having a userName and a message field. Both these methods take advantage of the initialization this.messageRef = firebase.database().ref().child('messages');, on which we apply on for the listener, and push to the sender.
3. App.js
componentDidMount() {
    firebase.auth().onAuthStateChanged(user => {
      this.setState({ user });
    });
  }

  handleSignIn() {
    firebase.auth().signInWithEmailAndPassword(
      this.state.email, this.state.password).catch(function(error) {
      // Handle Errors here.
      var errorCode = error.code;
      var errorMessage = error.message;
      // ...
    });
  }

  handleSignUp() {
    firebase.auth().createUserWithEmailAndPassword(
      this.state.email, this.state.password).catch(function(error) {
      // Handle Errors here.
      var errorCode = error.code;
      var errorMessage = error.message;
      // ...
    });
  }

  handleLogOut() {
    firebase.auth().signOut();
  }
Here we have used a couple of authentication methods provided by Firebase - it is very intuitive to use, and more can be learned here in the firebase documentation.
4. config.js
export default {
  apiKey: "<your api key>",
  authDomain: "https://react-firebase-demo-68bad.firebaseapp.com/",
  databaseURL: "https://react-firebase-demo-68bad.firebaseio.com",
  projectId: "react-firebase-demo-68bad",
};
You can find them here:

|
|---|
Note that you might want to set up your configuration in a different way if you are serious about the deployment, so as to keep the apiKey out of your repository. But in any case, it isn’t really a huge risk to have the apiKey public, as it is essentially an identifier for your project.
5. database.rules.json
For now, we can open up our database - but for more secured deployment, please carefully modify the rules to suit your needs!
{
  /* Visit https://firebase.google.com/docs/database/security to learn more about security rules. */
  "rules": {
    ".read": true,
    ".write": true
  }
}
6. Test Chatroom Locally
npm start
|
|---|
Note that if you have another logged in user in a different browser’s window, that user will also be able to see the new message - real-time!
7. Deploy it! (Again!)
npm run build
firebase deploy
And we’re done! Check out the demo app here and leave me a message!
Resources
Two great books I’ve been reading on lately are The Road to learn React: Your journey to master plain yet pragmatic React.js and The Road to React with Firebase
. These are fairly introductory books into the subjects but serve as great primers nonetheless. You can pair them with online materials (like my blog!) and together they will take you quite far!
References
Shout out to the resources that I’ve heavily relied on!
Leave a comment