

Detailed Guide to Setting Up GCP for Deep Learning
Links to Other Parts of Series
Overview
In this blog post, we will walk through how to take advantage of cloud services, particularly Google Cloud Platform (GCP), and configure it for training machine learning models. We will discuss the many options available, and hopefully by the end of this post, you will have a very clear idea on which option best fits your need, and how to go about that particular option. The goal of this tutorial is to enable you to start from scratch, and in the end, help you launch a Jupyter notebook connected to the GCP server, where you can train and evaluate your models.
Why GCP?
You can read about all the reasons you might want to consider Google Cloud Platform over some alternative competitors, but for me, the $300 free credit over a 12-month period was definitely a very appealing aspect. As it is Google, it provides a comprehensive array of services, so although we will only cover setting up and configuring a Virtual Machine (VM), it nonetheless also helps you get familiar with GCP itself, and may come in handy in the future, when you might need to use GCP for other types of services.
Steps
1. Getting Started
Get to the home page, and click on the “Get Started for Free” button on the upper right corner.

|
|---|
2. Registration / Signup
Sign up by following the instructions and steps.

|
|---|
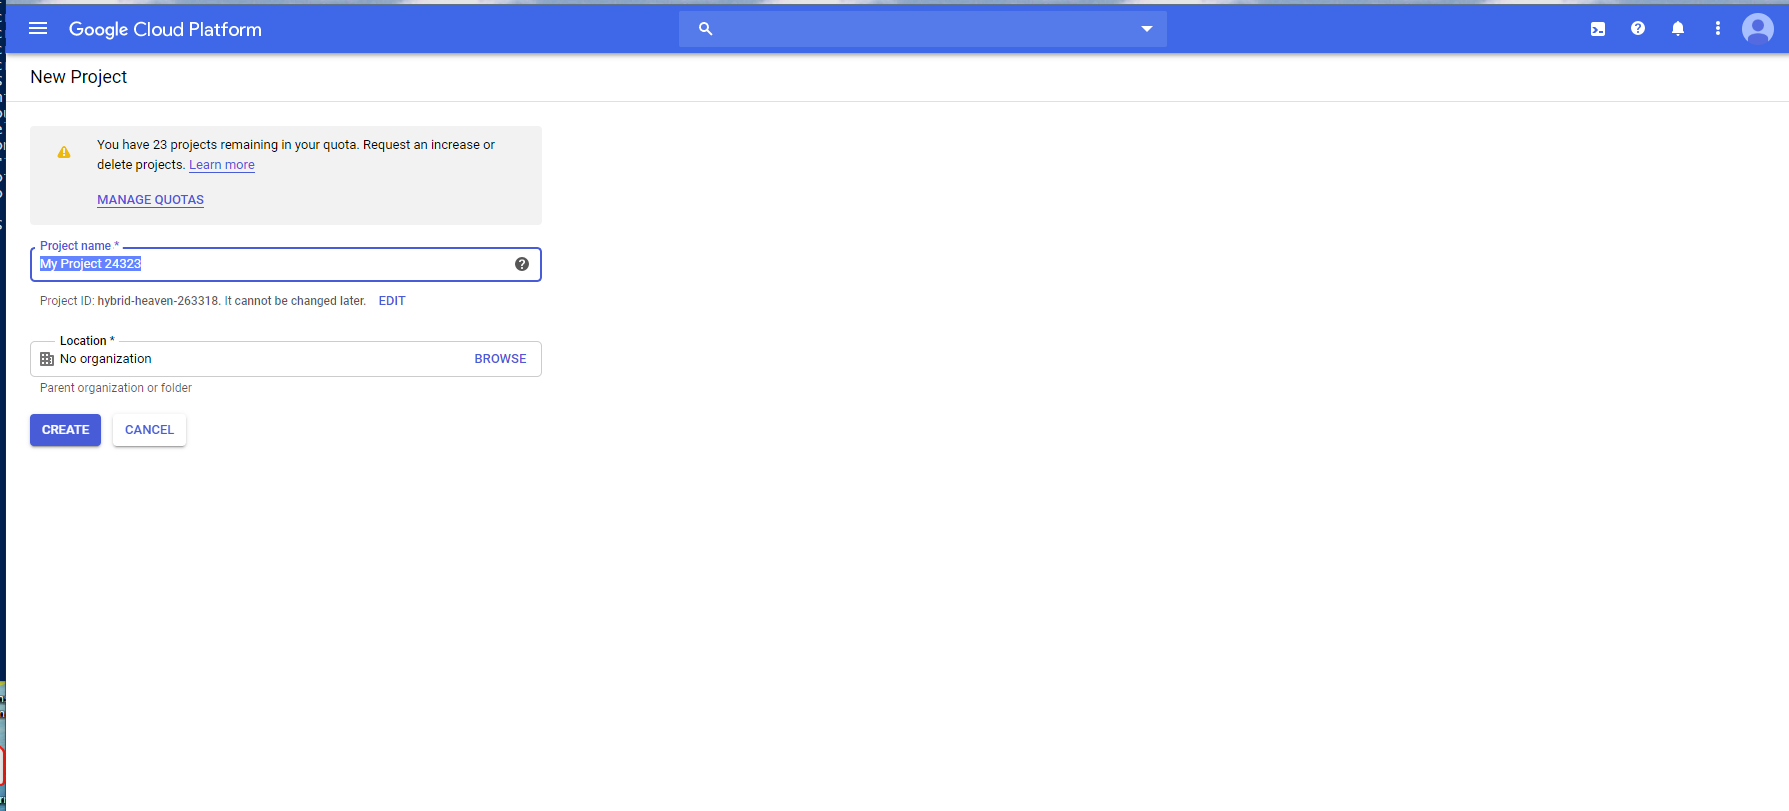
3. Create Project
Once you are done signing up, you would be prompted to create a new project. Other resources such as the VM we will create later, will be bound to this project.
|
|---|
4. GPU Quotas (Optional)
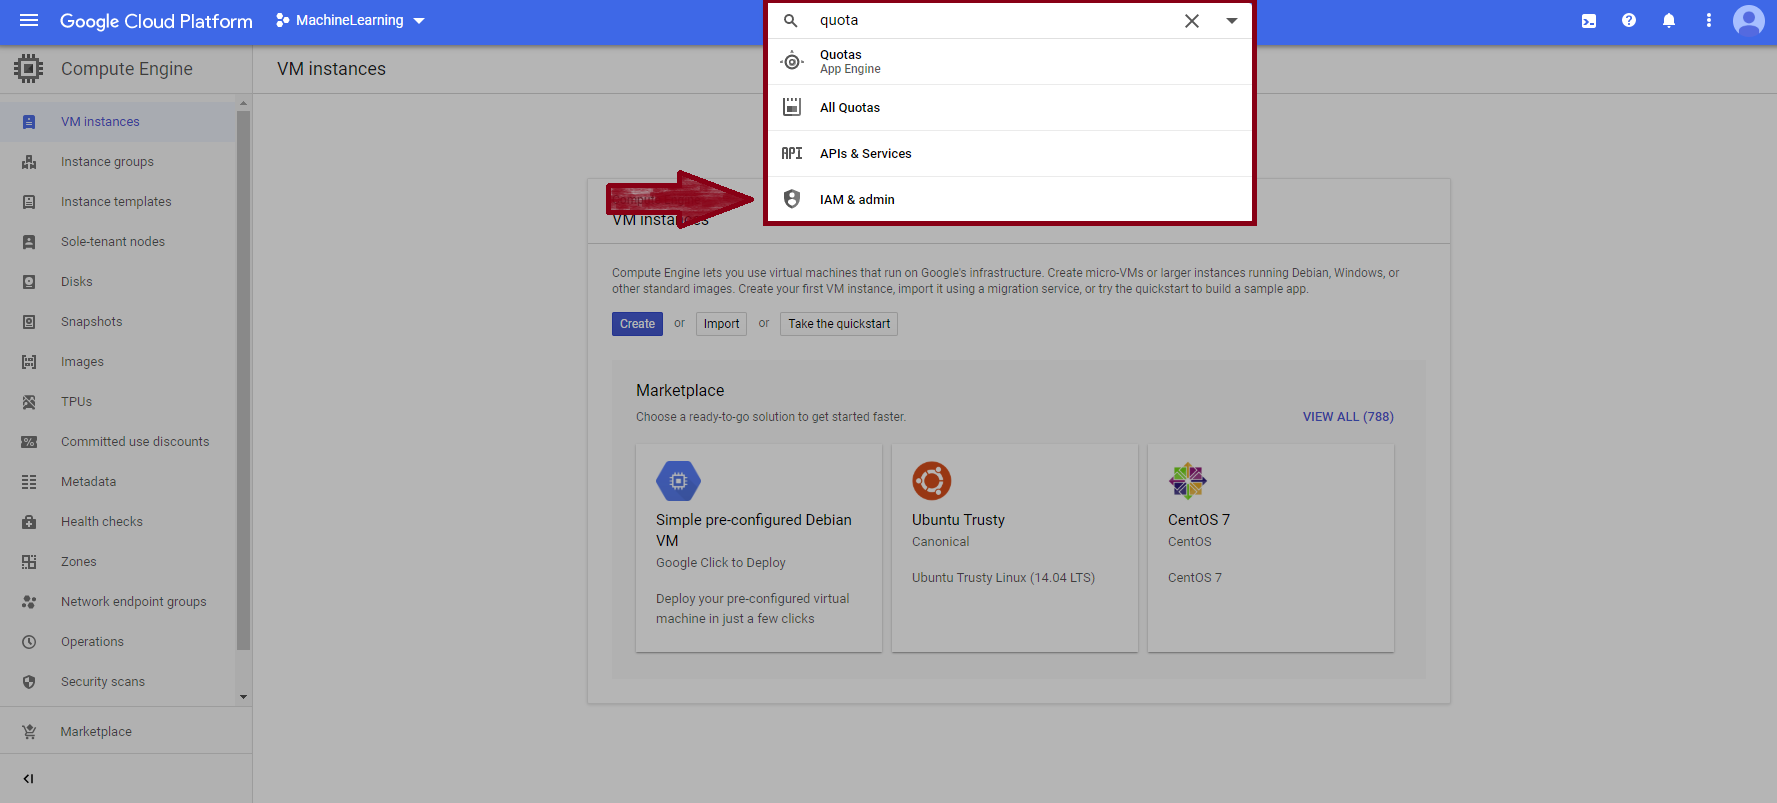
If you would like to take advantage of GCP’s GPU units for training your deep learning models, you might need to request an increase in quotas, since for most of us, the starting quota is 0. If all you need is CPU, then you can skip this step.
First, type in “quota” in the search bar, and click on the “IAM & admin” from the dropdown.
|
|---|
Next, from the side bar, seelct “Quotas”, which would open up all the current quotas you have for the variety of services.

|
|---|
Find the quotas you would like to increase - note that they are separated by specific GPU types and “zones” (e.g. us-east1). If you want, you could search for “GPU (all regions)” in the Metric filter, and request an increase for that metric - however, an increase in that metric alone might not suffice, since the result iss usually still 1 GPU per region, although the overall limit have been increased to 4. That is, if you intend to employ more than 1 GPUs in a given region, you might want to increase the quota by a specific region.
Once you have decided which quotas to request an increase, click on “Edit Quotas”, and follow the instructions to finish the process. The approval process is usually fairly fast (but plan to wait for a full busniess day at least). You will get an email once it is approved.

|
|---|
5. Create the VM
If Step 4 is finished and approved, we are now able to create a VM with GPUs attached - otherwise, we can still proceed, but can only work with CPUs until Step 4 is approved.

|
|---|
Navigate to our Compute Engine homepage, and click on “VM instances” on the sidebar. If we are going the GPU route, here we have a decision to make: 1. Use the “Marketplace” and search for “Deep Learning VM”, then follow along its instructions to finish the easy (but more costly) deployment. 2. Set up a VM from scratch.
We will cover the 2nd route here, since route 1 is fairly straightforward (it’s under “Google Click to Deploy”, after all). Advantages of route 1 is that everything you need for deep learning is probably already pre-configured, including the GPU drivers and related tools - the only disadvantage for me is that I did not find an option to use the so called “preemptible” option. The “preemptible” option basically means two things: 1. the instance will live no longer than 24 hours; 2. the instance might be shutdown without any notice by GCP, if it needs to allocate that resource to other non-preemptible instances. In return, what we get is highly discounted pricing. You can check out GPU Pricing page for more details on pricing.
So should we choose the preemptible option or not? Personally, I have had decent experience with the preemptible instances in the past, since even though we get $300 credits, we can still burn through it quite fast if we are playing with GPUs, and hence the discounted pricing from preemptible instances gives us more room to play with. However, more recently, I have had some terrible experiances with GPUs in zone us-central1-a, where my instance would be reclaimed within minutes or at most half an hour, before any serious progress could be made. I am not sure if this is zone-specific or time-of-year (Christmas) specific, but I am now considering paying more for a non-preemptible instance to get me through some trainings that would take longer.
NOTE: If you decide to go the non-preemptible route (either setting up a VM from scratch or using the Deep Learning VM from Marketplace), remember to “STOP” your VM after you you are done, otherwise even if you are not using it, you will still be charged! This is also true for preemptible VMs, but since those can live no longer than 24 hours, it at least won’t drain all your credits if you happen to forget about stopping the VM.
All that said, let’s get started creating a VM from scratch.
|
|---|
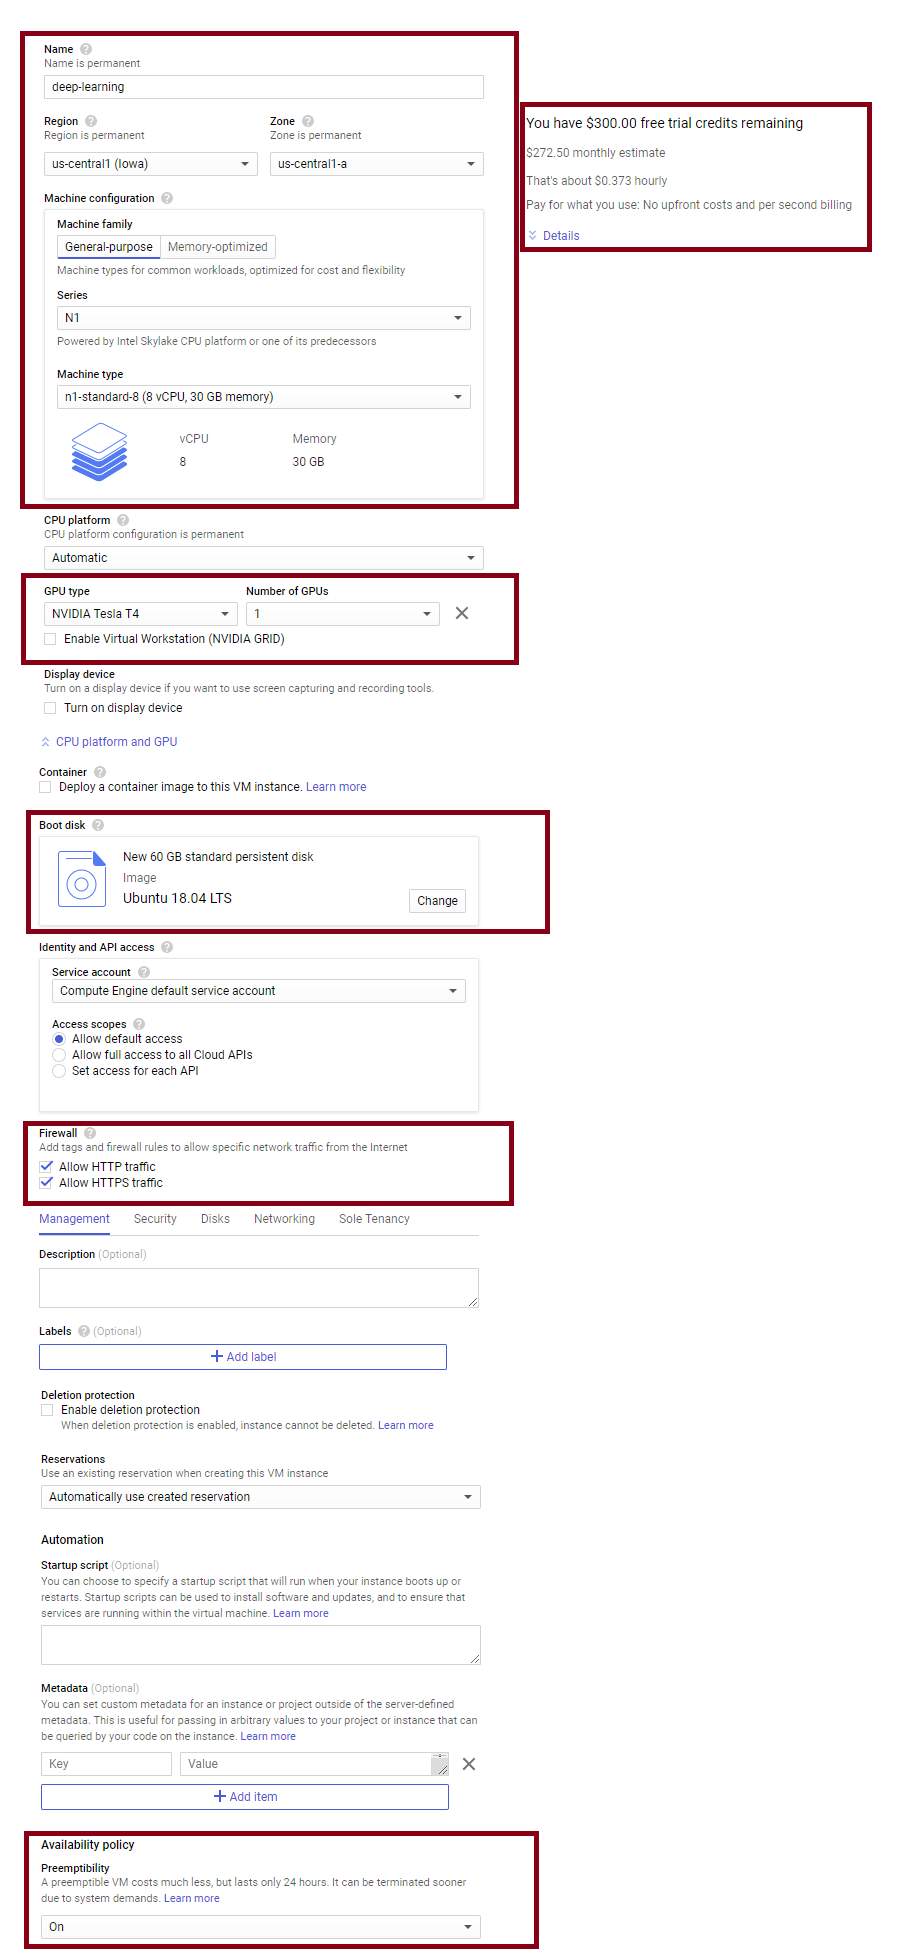
You will notice that you can choose, the region/zone, CPU, GPU, and other settings here. The zone you select will affect what GPUs are available, you can click around to see what best fits your need - on the right hand side, you will be given a cost estimate - you can also check out the GPU pricing list linked above to get a better idea of what you are getting. For Boot disk, I usually just select Ubuntu since it’s pretty easy to work with; I’ve set 60 GB as the size, but depending on what you intend to work on it, you can choose a different size - compared to GPUs, these storage cost are really low, but they will be charged regardless of whether the VM is running or not.
Under firewall, let’s check allow HTTP and HTTPS traffic, although we will most likely need to add an additional rule later for us to connect to our jupyter notebook. At the bottom, you will find the “Availability policy” - as discussed earlier, I usually select preemptibility to be “ON”, but more recently, this has caused some frustration.
Once you’re all set, click on the “create” button, and wait for the instance to be created.
6. Configuring your Ubuntu VM
Once the VM is created, you can click on the 3 vertical dots on the right, then select “start”. Once it is started, the “SSH” under “connect” would become clickable, and clicking it would instruct GCP to open a window acting as a ssh terminal into the VM. You might need to set up some SSH keys if this is the first time, but just follow the instructions and you shall be fine.

|
|---|
Once you are in, there are a couple of things you would want to do.
Setup Python / pip / virtualenv and etc.
sudo apt-get update && sudo apt-get install python3-pip
sudo pip3 install --upgrade pip
sudo pip3 install --upgrade virtualenv
sudo pip3 install notebook
You can read more about virtualenv and Jupyter notebooks here. I am customed to using virtual environments, to help keep my projects clean, but this is not strictly necessary. To use virtualenv, it is along the lines of
virtualenv env
source env/bin/activate
to create a virtualenv and activate it, then within the virtualenv, you can pip install the packages you need for this project, and setup this environment as a Kernel for the Jupyter notebook (last 2 lines below). “kaggle” can be other names you name this kernel, as long as you can recognize what it represents later.
pip install tensorflow-gpu
...
...

pip install ipykernel
python -m ipykernel install --user --name=kaggle
Install GPU drivers and tools such as CUDA / cuDNN
(Only if you are using GPUs)
First figure out what CUDA and cuDNN versions are required for your version of TensorFlow (or other Deep Learning libraries of your choice). For me, I am using TF 2.0, and the table tells me to install cuDNN 7.4 and CUDA 10.0. You can find guides on how to install these on your Ubuntu machine, but these linked from NVIDIA were fairly straightforward: A. CUDA B. cuDNN
Note that cuDNN requires a developer account (which you can register for free), but that made it a bit more complicated to operate on Ubuntu. I simply downloaded the required deb file, uploaded to the Ubuntu machine (on the SSH window, upper right corner, click on the icon and select “upload file”), then proceeded from there.
Testing GPU
Now, within your activated virtual environment (if you used one), type “python” to open up a shell, and check whether you can detect and utilize the GPU. For me, (Keras with TF backend), it was
from keras import backend as K
K.tensorflow_backend._get_available_gpus()
and it printed out my GPU device. If it is printing out errors, Google is usually your best friend - search along and try to identify what was not implemented correctly. Check your packages versions, double check they match your CUDA / cuDNN versions, etc. Don’t be afraid to mess up - the beauty of these VMs is that it is so easy to spin up a fresh one, but hopefully we don’t come to that.
Configure Jupyter Notebook
Here you can find more details on configuring Jupyter notebook, but for me, the following sufficed:
jupyter notebook --generate-config
Then within the generated configuration, find the following items, uncomment them and modify to as below, wher
c.NotebookApp.ip = '*'
c.NotebookApp.open_browser = False
c.NotebookApp.port = <Port Number>
7. Configuring Firewall
If we want to access the Jupyter Notebook server we’ve started on the VM, we need to allow traffic into our VM on that port.
|
|---|
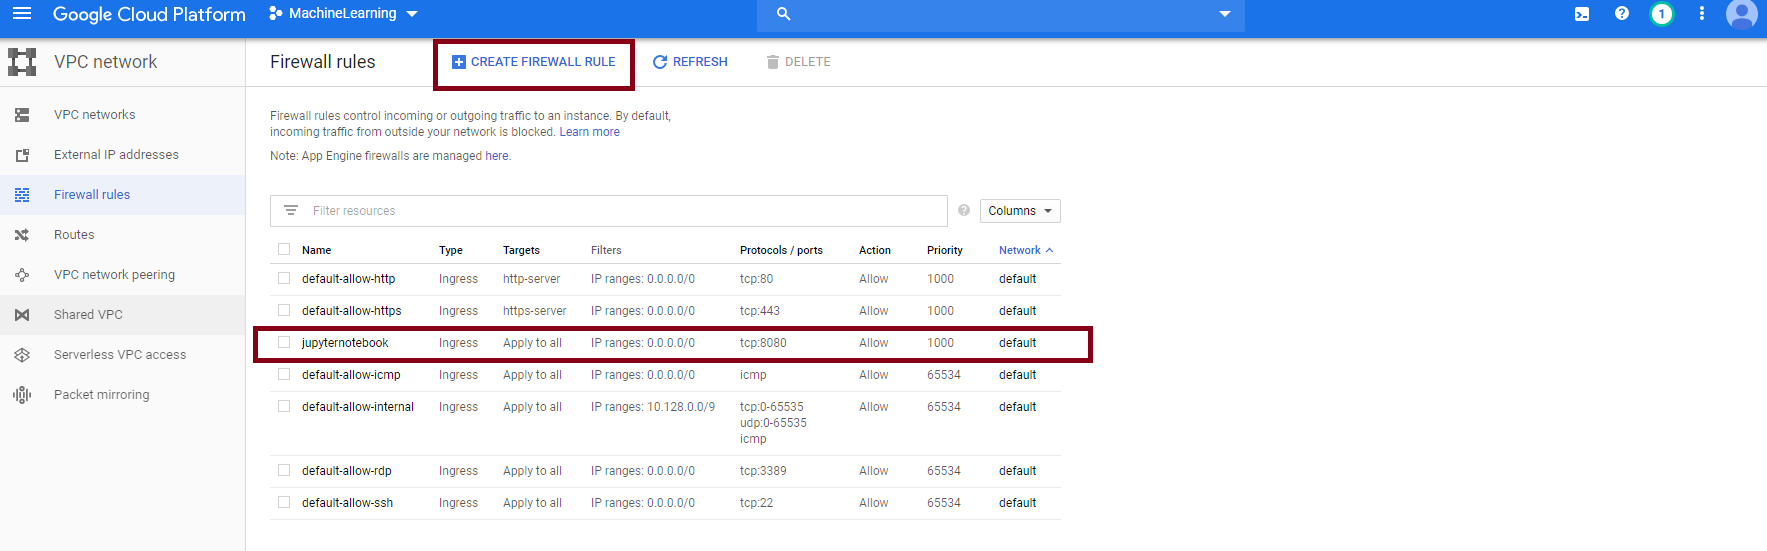
From the menu on the upper right hand corner, select VPC network - Firewall Rules. Create a new rule, which allows all traffic into port
8. Connecting to Jupyter Server on VM
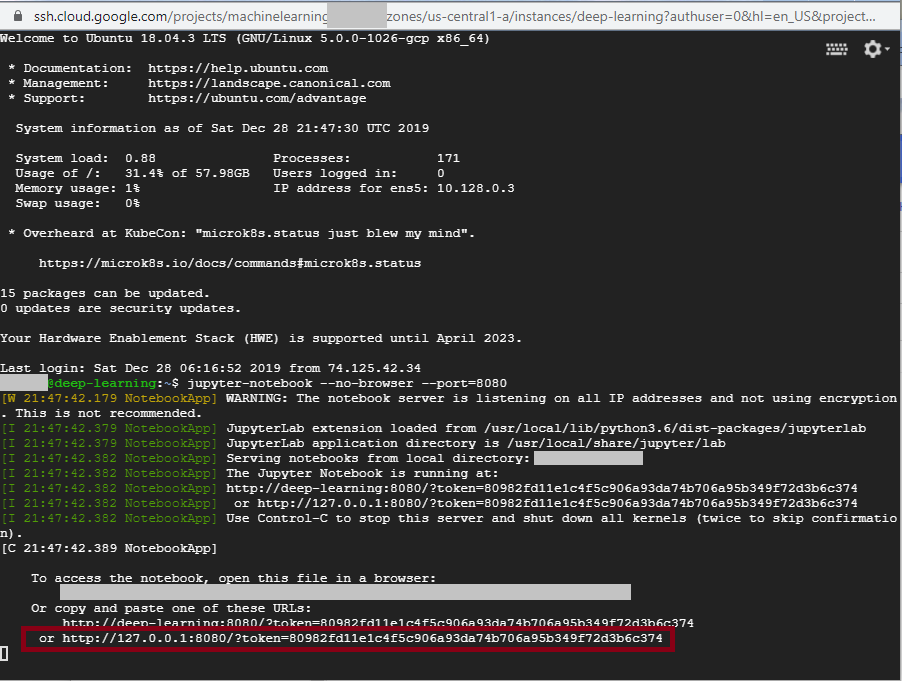
Now in your SSH terminal, you should be able to type in
jupyter-notebook --no-browser --port=<Port Number>
In the print outs, there should be some links with a “token” parameter:
|
|---|
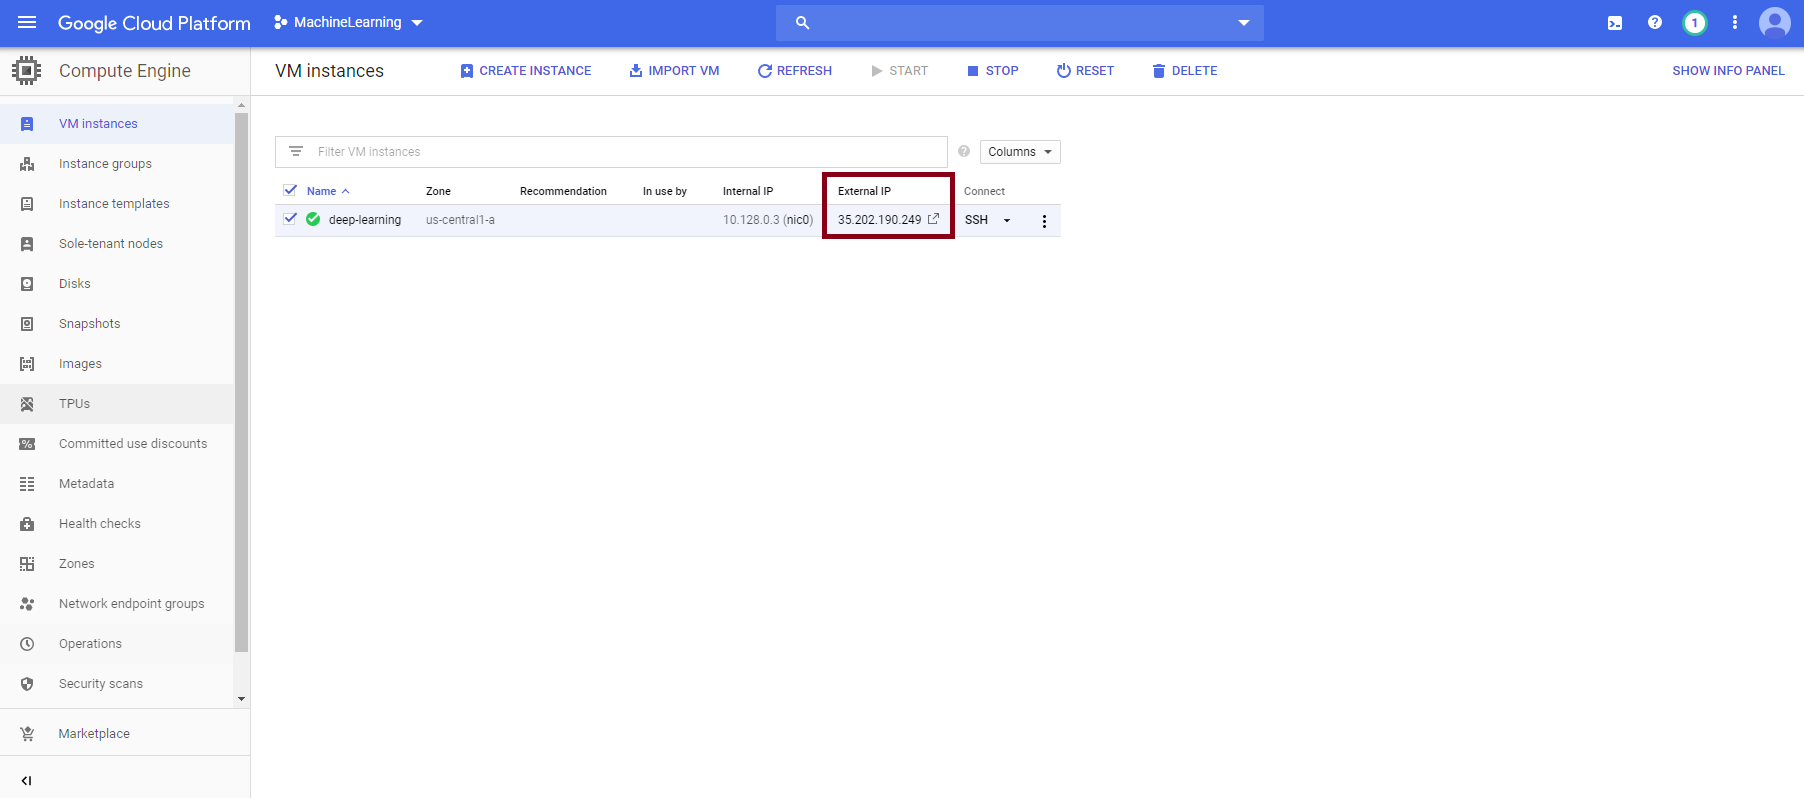
Copy that link, but replace the IP part with your External IP allocated by GCP:
|
|---|
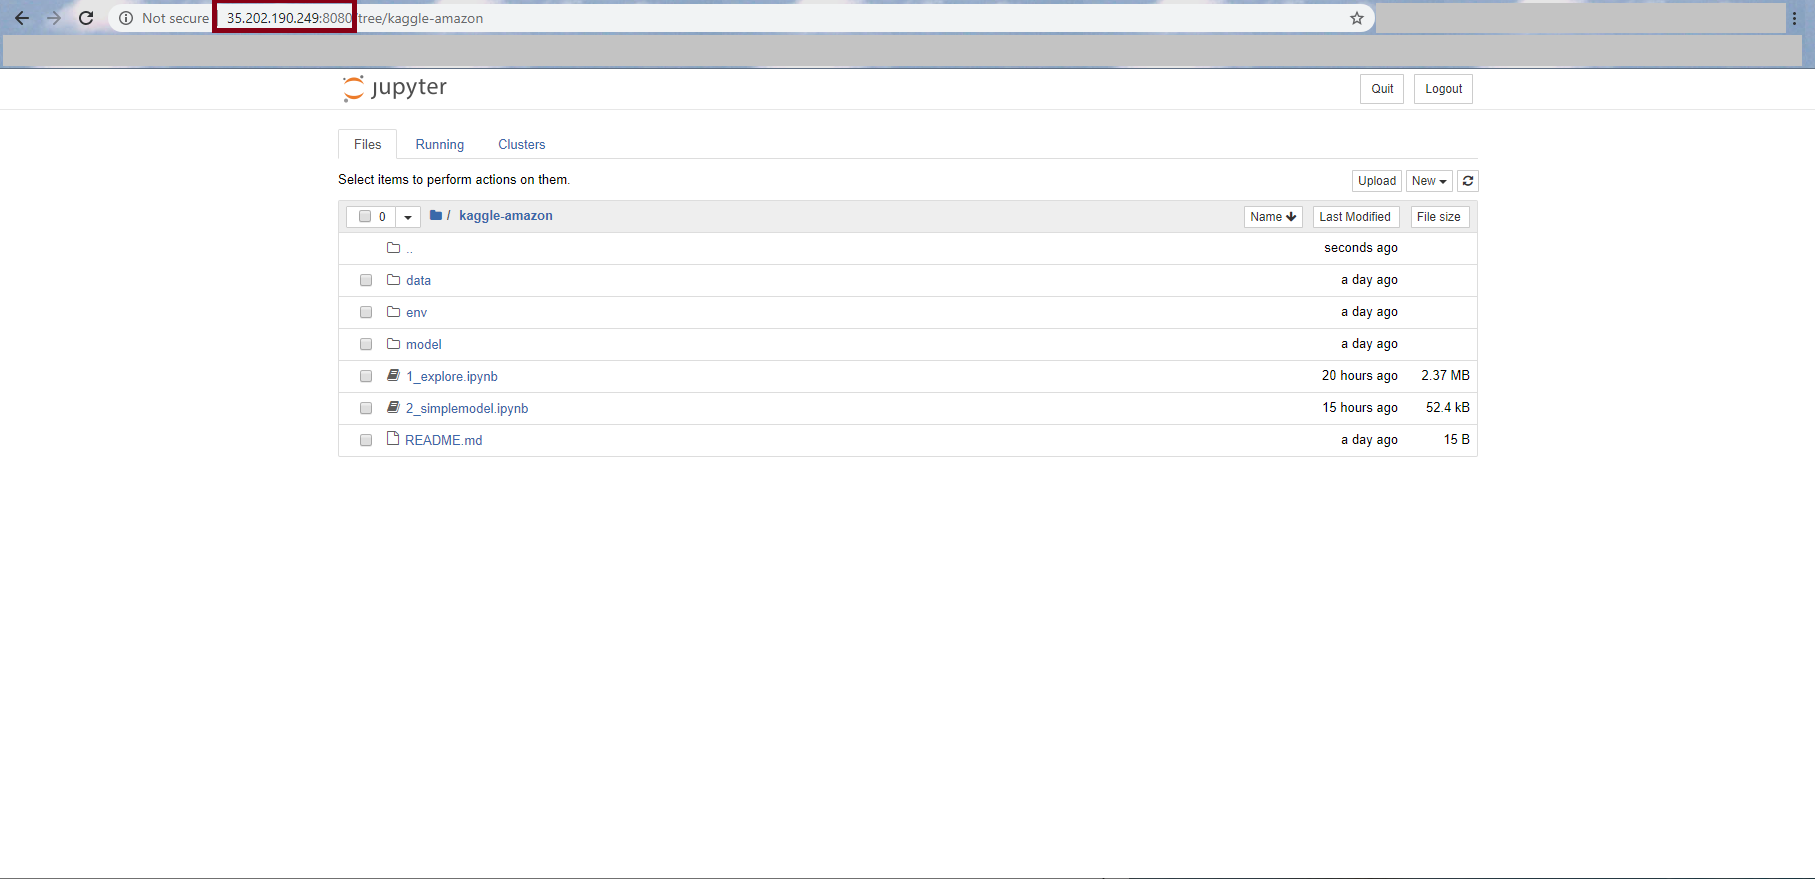
Then go into your favorite browser, and navigate to that address (http://<your external IP>:<Port Number>/?token=<generated token>) and start having fun!
|
|---|
Final Note
Don’t forget to stop your VM once you’re done with a session!! To stop a VM, simply click on the 3 vertical dots you’ve used to “start” the VM, but this time, choose “stop”.
Resources
A great resource / hands-on guide on performing Data Science tasks on GCP can be found here: Data Science on the Google Cloud Platform.
Leave a comment